Creating ActiveX Controls with Visual Basic
In the following an example application (a slightly modified FlexGrid) is shown how to create an ActiveX control.
1. start Visual Basic
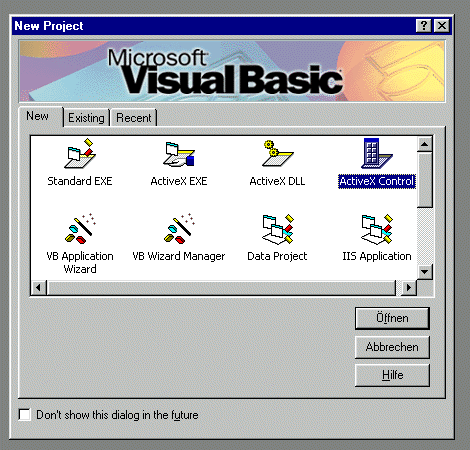
2. select ActiveX Control for New Project
A component called MSFlexGrid is to be used for the control. If this component is already available on the component bar (if you dwell with the mouse pointer over the symbols for a moment, the respective name is displayed as short information) then click on it and mark the area on the main form that it should occupy.
If it is not yet available: Right mouse click on the component bar -> Components.
![]()
Select Microsoft FlexGrid Control in the following dialogue. If this is not displayed then the check box "selected Items only" is disabled.

If the component is still not visible, use browse to search for the file (Msflxgrd.ocx).
Now insert the MSFlexGrid on the control as described above.
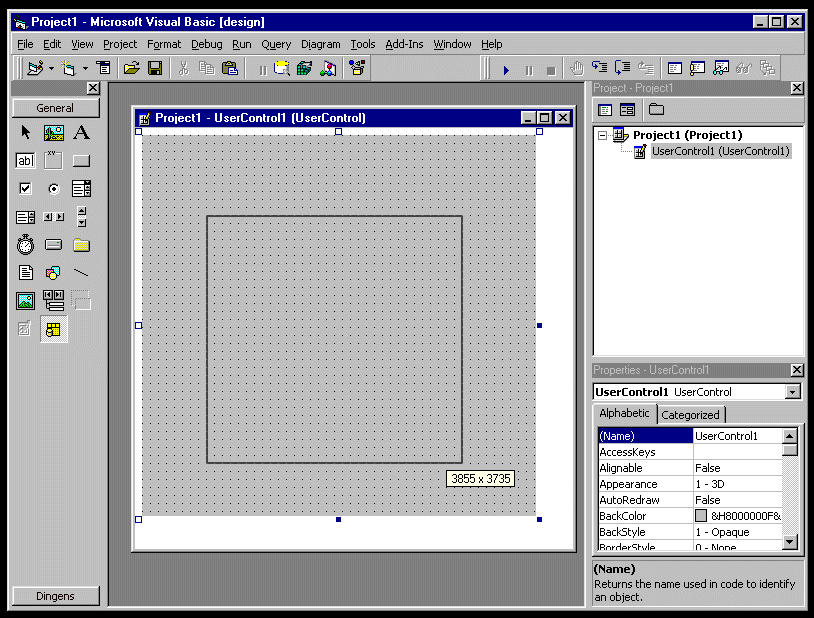
First of all, it makes sense to define the interface (i.e. the functions, procedures, events and properties that are visible to the superordinate component). There is a wizard for this (ActiveX Interface Control Wizard).
To call it up (like all other wizards) select Add-Ins from the menu bar. All wizards are listed here.
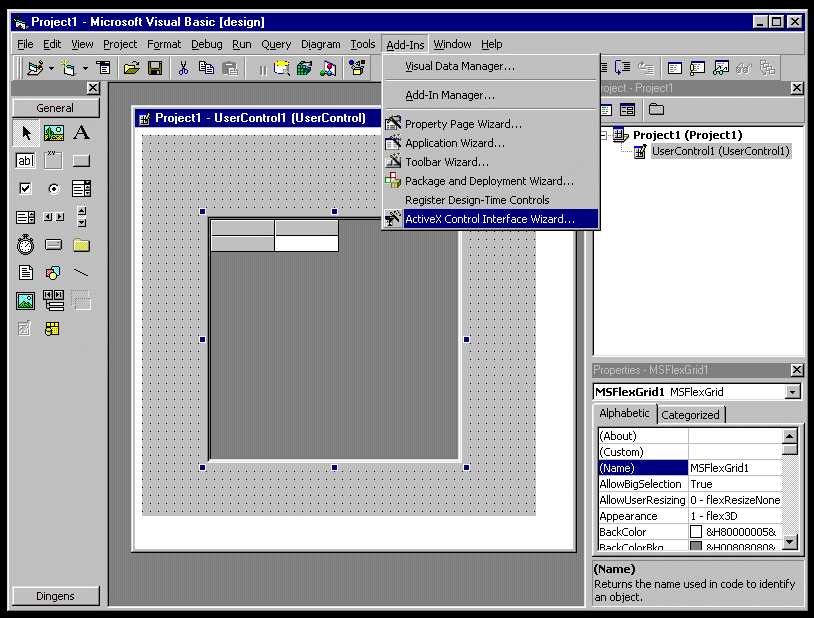
If you want to use a wizard that is not listed here, click on Add In Manager. In the following dialogue you can select a wizard to the already included ones. To do so, select the appropriate wizard and then activate the checkbox "Load/Unload". If you want to deactivate the wizard again, this checkbox must be deactivated. With the checkbox "Load on StartUp" you can define that the wizard is loaded at every start of Visual Basic.
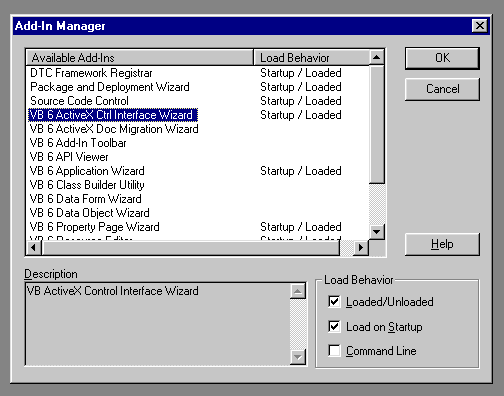
If you start the ActiveX Interface Control Wizard you can choose which standard functions and properties should be integrated into the interface. There are only two cases in which you should deviate from this selection:
Select Clear on the left and press ">".
Select BackStyle on the right and press "<".
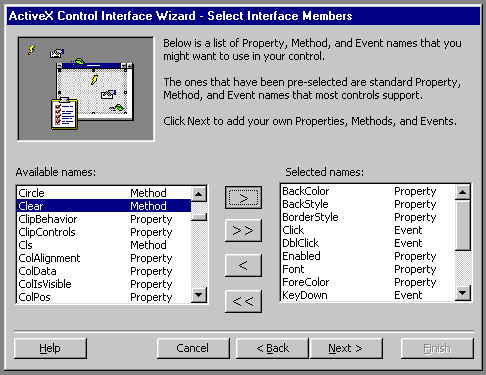
Clear is used to delete all cell contents. MSFlexGrid does not have a property backstyle, so this is not shown here.
With "next" you get to the next dialogue where you can create your own functions and properties. Click "new" and enter the name.
For example, enter "Clear", select "Method" and confirm with OK. The entries can be changed at any time with edit and deleted with delete.
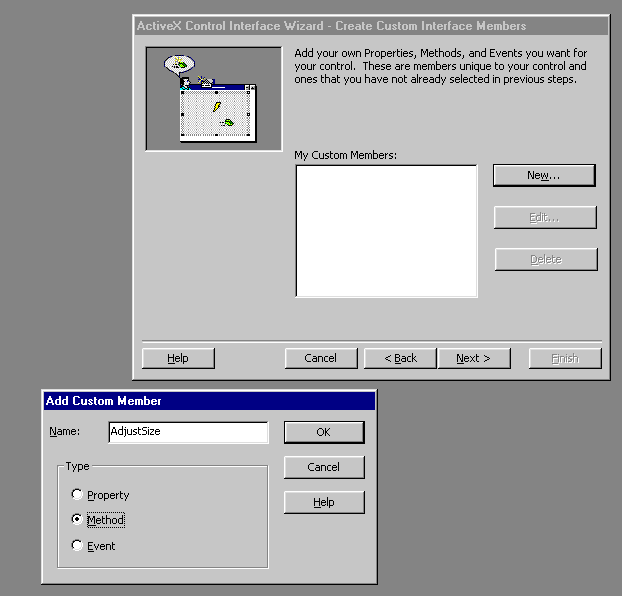
Here is an overview of all functions/properties that need to be defined:
| Name | Type |
|---|---|
| AdjustSize | Method |
| GetValue | Method |
| SetValue | Method |
| SetColumnWidth | Method |
| SetRowHeight | Method |
| SetColumns | Method |
| SetRows | Method |
| CellSelect | Event |
| Changed | Event |
| Resize | Event |
If you then select "next", you can now specify for each function/property/event which functions/properties/events are affected (or in the case of events, which other events trigger them).
Here are some examples:
The function "Clear" should enable the user to delete cell contents of the grid. The FlexGrid already provides this functionality; the corresponding function in FlexGrid is also called "Clear". These two functions must now be combined. Select "Clear" in the left selection box. With "maps to ... Control" select the name of the prefabricated FlexGrid component and then select the function "Clear" (member function of FlexGrid) at "member".
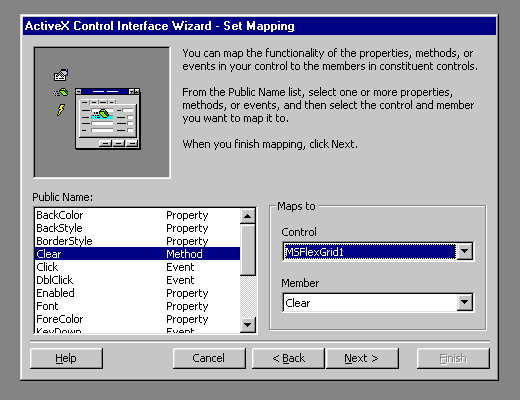
So now every time <owncomponent>.Clear <FlexGrid>.Clear is called.
2. the event "CellSelect" is to be triggered when the user has selected a new cell There is also a predefined event of the FlexGrid (SelChange) for this purpose. The own event "CellSelect" has to be connected to the already existing event. So you choose "CellSelect" in the left selection box. At maps to Control you also enter the name of the FlexGid and at "member" "SelChange".
3. the function "AdjustSize" is used to redraw the identifiers for all columns and rows. Such a function is not available with the prefabricated FlexGrid. Here the corresponding functionality must be programmed by the user. In such a case you leave "maps to" free.
Even with the standard properties, the connection must be specified explicitly (i.e. by "maps to" as above).
Some properties are already available as standard properties, e.g. "Refresh" these must not and cannot be redefined ("The member name you have created already exist").
in order to be able to follow the individual steps, here is an overview of all the details:
| own | Name | maps to Control | member |
|---|---|---|---|
| yes | AdjustSize | - | - |
| no | BackColor | MsFlexGrid1 | BackColor |
| no | BorderStyle | MsFlexGrid1 | BorderStyle |
| yes | Changed | MsFlexGrid1 | SelChange |
| no | Clear | MsFlexGrid1 | Clear |
| no | Click | MsFlexGrid1 | Click |
| no | DblClick | MsFlexGrid1 | DblClick |
| no | Enabled | MsFlexGrid1 | Enabled |
| no | Font | MsFlexGrid1 | Font |
| no | ForeColor | MsFlexGrid1 | ForeColor |
| yes | GetValue | - | - |
| no | KeyDown | MsFlexGrid1 | KeyDown |
| no | KeyPress | MsFlexGrid1 | KeyPress |
| no | KeyUp | MsFlexGrid1 | KeyUp |
| no | MouseDown | MsFlexGrid1 | MouseDown |
| no | MouseMove | MsFlexGrid1 | MouseMove |
| no | MouseUp | MsFlexGrid1 | MouseUp |
| no | Refresh | MsFlexGrid1 | Refresh |
| no | Resize | - | - |
| yes | SetColumns | - | - |
| yes | SetColumnWidth | - | - |
| yes | SetRowHeight | - | - |
| yes | SetRows | - | - |
| yes | SetValue | - | - |
| no | Resize | - | - |
If you now click on next, you can enter parameters, return values and default values for the self-written functions and events. "cellSelect" is not listed here, because this event is already assigned to an existing event by "maps to".
Here the values to be entered there:
| Name | ReturnType | Arguments |
|---|---|---|
| AdjustSize | Empty | - |
| GetValue | Variant | key As String |
| Resize | - | - |
| SetCoulumns | Variant | columns As Integer |
| SetColumnWidth | Variant | width As Integer |
| SetRowHeight | Variant | height As Long |
| SetRows | Variant | rows As Variant |
| SetValue | Variant | value As String, key As String |
Now click on Next again. You now have the possibility to display a report. This report contains general instructions on how to test and debug an ActiveX control.
The mappings you specified in the ActiveX Control Interface Wizard are now included in the source code. As an example the Clear function is shown here:
'WARNING! DO NOT REMOVE OR MODIFY THE FOLLOWING COMMENTED LINES!
MappingInfo=MSFlexGrid1,MSFlexGrid1,-1,Clear
Public Sub Clear()
MSFlexGrid1.Clear
End Sub
If you want to leave it at that, that the clear function only calls the clear function of the MsFlexGrid, there is nothing more to change. But if you want to redraw the names of the columns and rows, you can insert the appropriate information here:
' WARNING! DO NOT REMOVE OR MODIFY THE FOLLOWING COMMENTED LINES!
MappingInfo=MSFlexGrid1,MSFlexGrid1,-1,Clear
Public Sub Clear()
MSFlexGrid1.Clear
AdjustSize
End Sub
but the function AdjustSize is currently empty:
'WARNING! DO NOT REMOVE OR MODIFY THE FOLLOWING COMMENTED LINES!
'MemberInfo=5
Public Sub AdjustSize()
End Sub
Here too, functionality is to be added:
Public Sub AdjustSize()
'readjusts the cell sizes and redraws the labels
SetColumnWidth ((width - scrollBarWidth) / MSFlexGrid1.Cols)
SetRowHeight ((height - scrollBarHeight) / MSFlexGrid1.rows)
ColumnLabels
RowLabels
End Sub
MSFlexGrid1 is the MsFlexGrid. Cols returns the number of columns rows the number of rows. "scrollBarWidth" is a constant that takes into account the size of the visible scrollbar. SetColumnWidth, SetRowHeigth are interface functions yet to be programmed, which set the column width and row height. "ColumnLabels" and "RowLabels" are private (i.e. not visible to the outside) functions.
Here is the source code for the latter two:
Private Sub RowLabels()
write in each line its number (the numbering starts with 1)
MSFlexGrid1.Col = 0
For i = 1 To MSFlexGrid1.rows - 1
MSFlexGrid1.Row = i
MSFlexGrid1.text = i
Next
End Sub
Private Sub ColumnLabels()
'write in each column its identifier
MSFlexGrid1.Row = 0
For i = 1 To MSFlexGrid1.Cols - 1
MSFlexGrid1.Col = i
MSFlexGrid1.Text = ConvertNumberToLetter(i)
Next
End Sub
With MSFlexGrid1.Col you set the current column, with MSFlexGrid1.Row the current row. With MSFlexGrid1.Text you can write a text in the cell defined by it.
...
3. testing and debugging
To test the ActiveX control, program groups are usually used. These make it possible to combine several projects and to insert one project (the control) into another (e.g. a standard EXE or an ActiveX control) and to test it.
Theoretically you can also compile a Control Complete, install it and then use it as a *.ocx file in another application. However, this way is normally not recommended, because the complete compilation and installation takes much more time.
How to create a programme group:
- close the source code editor for the control (with the "x" of the corresponding window)
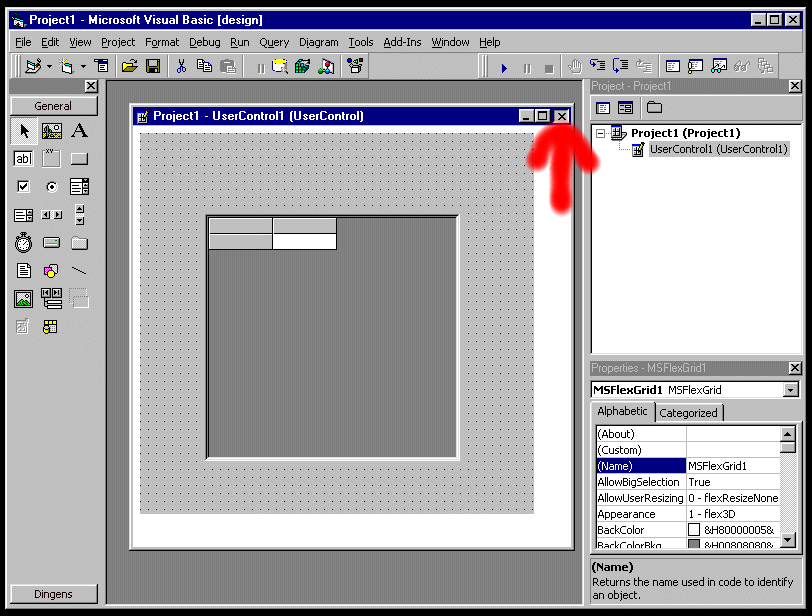
- File -> addProject
- now choose the type of application you want to test the control with (preferably a standard EXE)
- the control now appears on the component bar. (If it is shaded grey, the source code editor was not closed properly)
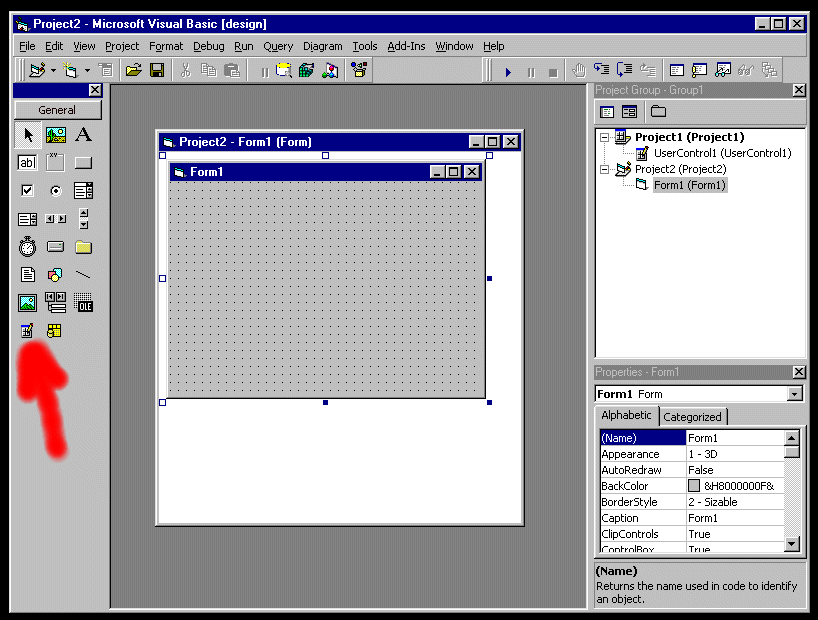
- now you can integrate your own control into the form like any existing one.
If the inserted control is shaded grey, this indicates that the source code editor is still open for it, just like the symbol in the component bar above.
To ensure that the newly added standardExe starts and not the control alone, select the corresponding project with the left mouse button, then press the right mouse button and select "set as start up" from the context menu.
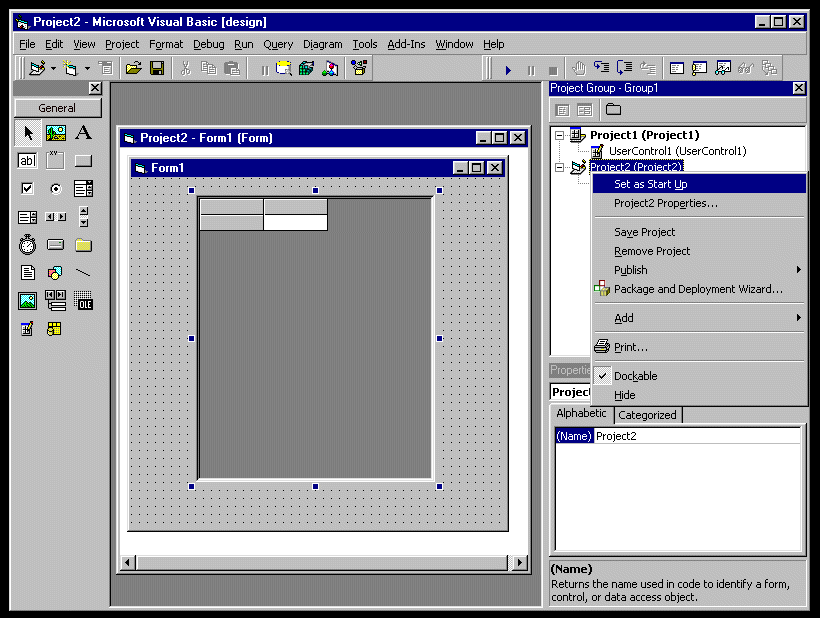
If you now want to make changes to the ActiveX control, open the corresponding source code editor again (double-click on the form in the project view) make the changes and close the source code editor again.
The programme group can of course be saved like any normal project.
An important property of the control and the associated project is the name. This can be seen and changed in the corresponding property window. The name is important because the ProgID (the identifier that identifies the control in the registry) is composed of the name of the project and the name of the associated control. If the name of the project is "ClassiX" and the name of the control is "Grid" the ProgID = "ClassiX.Grid".
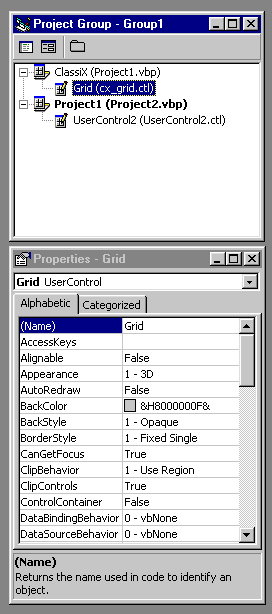
In the ActiveX control test container (which is part of Microsoft Visual Studio 6.0) the control is loaded with this name.
This test container can be started via Start -> Programs -> Microsoft Visual Studio 6.0 -> Microsoft Visual Studio 6.0 Tools -> ActiveX Control Test Container
With Edit -> Insert New Control you can insert a new control. Of course the control must be installed first. See further down in the chapter Installation.
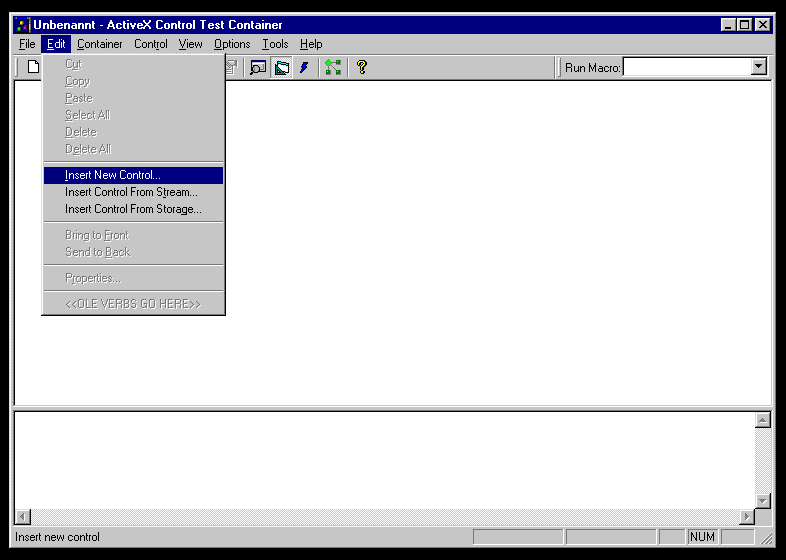
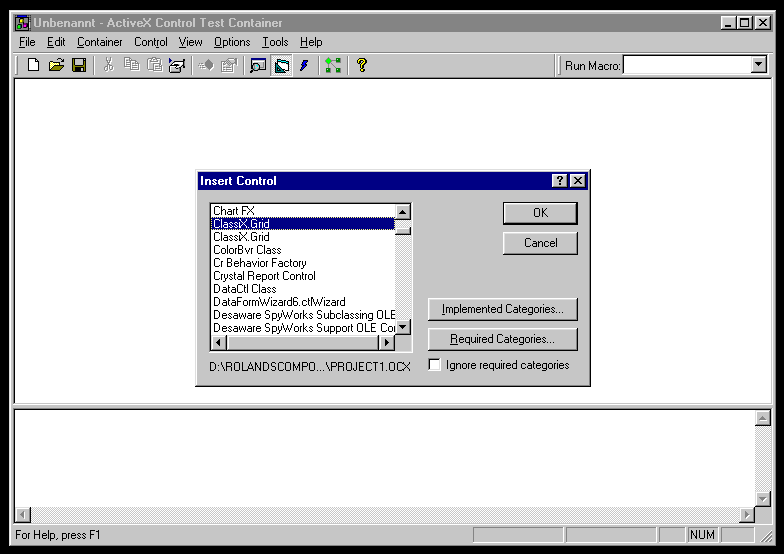
Note: The control can only be started in the test container described above, as well as in the ClassiX® test container, if it is not running simultaneously in the VisualBasic development environment. In the Microsoft test container it can be called, but no events are displayed.
4.installation
If the project has not yet been saved, you will be prompted to save the project at the latest during compilation. Please note that the ocx-file will automatically get the same name as the file you saved the project with. If you have saved the project under Project1 (as Visual Basic defaults), the ocx-file is called Project1.ocx.
Mark the project to be compiled (if a program group has been created) and then call the "Package and Deployment Wizard", which can also be called up via AddIns (menu) or, if not yet integrated, can be integrated from there (see above under "ActiveX Interface Control Wizard").
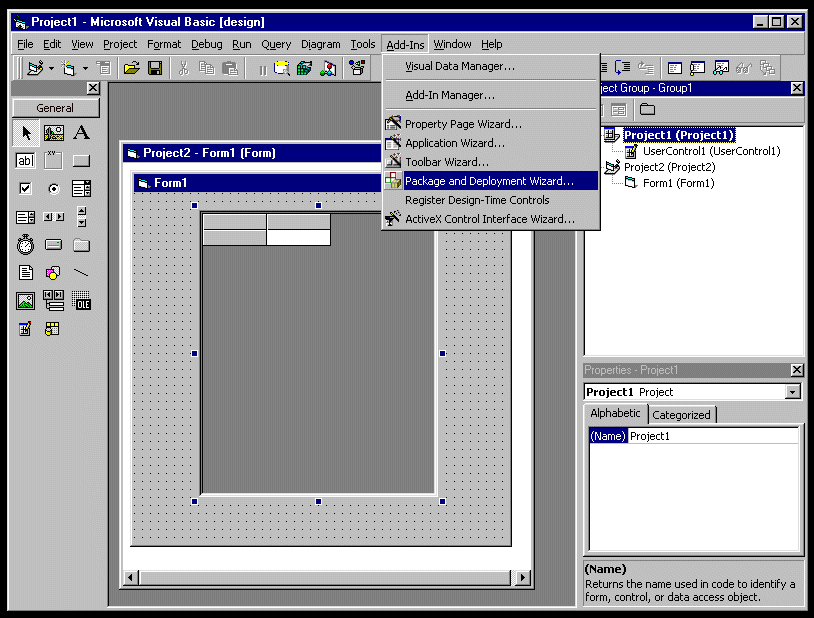
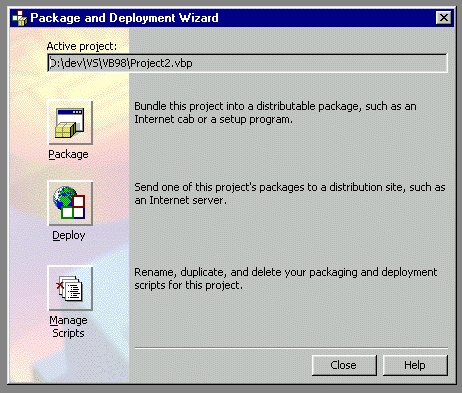
In the first selection window, select the type of application. If you want to create a usual setup programme for installation, select "Package".
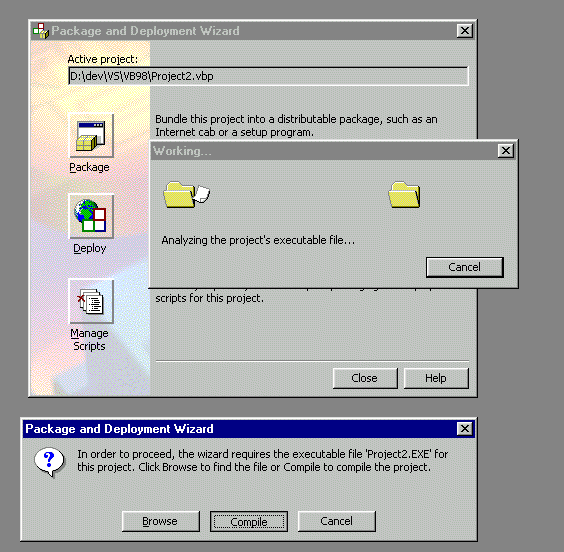
If the wizard finds an existing application (*.ocx) it asks if it should be used or if a new one should be created. If you have made changes, they should normally be compiled, so it is almost always a good idea to choose "recompile". But when you first create a new ocx file there is no old ocx file available, so there is no need to ask here.
In the next window, select a script for the compilation process (see the Microsoft documentation for details).
You simply choose the "Standard Setup Package 1". Also on the next page "Standard Setup Package" as package type. In the following window you have to specify the directory for the setup file and the associated files.
In the next step you can choose which files should be delivered (pre-selection is recommended here). Then you can choose if you want to create one big *.cab file or several small ones, what the title of the installation should be, in which program group an entry should be created for the component (choose here e.g.: Startmenue->Programs->Grid).
For details of the installation process, please consult the Microsoft online help.